Recent posts: Blog
Stop selling your tracks, start streaming!
According to recent stats from Nielsen Music, digital download music sales are plummeting while streaming continues to boom. During the last week in August, digital downloads in the U.S. plummeted to 15.66 million – its lowest weekly volume since 2007 – whereas on-demand audio and video streams rose to 6.6 billion – its highest weekly volume ever.
Streaming now represents a third of U.S. music revenue; up from just five percent five years ago. Compared to total CD sales, which were down 31.5 percent in the first half of 2015, streaming revenues were up by 23 percent, according to the Recording Industry Association of America (RIAA). For the first time, U.S. sales from streaming surpassed $1 billion in the first six months of the year.
The trend is abundantly clear – as streaming gains favor among consumers, revenues from album sales and digital downloads are drying up. This is an alarming problem for songwriters and composers – the people who are the creative engine powering the entire music industry – because streaming revenue does not come close to closing the gap in physical sales, and certainly does not reflect the scale of music use on these new platforms.
Under the current system of antiquated laws, it takes nearly one million streams, on average, for a songwriter to make just $100 on the largest streaming service. However, songwriters are limited in their ability to negotiate higher compensation in these situations. When licensees and Performing Rights Organizations, cannot reach an agreement, songwriters are forced to use an expensive and inefficient rate court process in which a single federal judge decides the rate.
No other industry works this way, and we are way past due for a change. But that will not happen unless songwriters, composers and music fans make their voices heard in the ongoing debate over music licensing reform. If we truly believe that music has value, we must urge our leaders in Washington to make changes that ensure songwriters are able to receive fair compensation for their work in the marketplace.
Fortunately, the U.S. Copyright Office, members of Congress and many industry observers have realized the absurdity of the current regulatory framework and called for reform. Importantly, the DOJ is formally considering much needed updates to the ASCAP and BMI consent decrees that would better reflect the way people listen to music today. As part of the DOJ process, ASCAP has recommended changes that would foster continued innovation and competition, and result in music licensing rates that better reflect the free market.
Songwriters and composers are the lifeblood of America’s music industry – without their work, Pandora, Apple Music, Spotify, Tidal and the like would have nothing to offer new listeners. A music licensing system that reflects advances in technology and today’s competitive landscape would better serve everyone, allowing songwriters to continue creating the music that is loved by so many.
Does spotify help us in selling our music?
Economists Luis Aguiar and Joel Waldfogel looked at music sales in countries Spotify operated in between 2013 and 2015, and concluded that: “Spotify use displaces permanent downloads” — that is, if you’re getting your music from Spotify, you don’t need to buy it from iTunes. But they also found that “Spotify displaces music piracy,” and that the two trends balance each other out: “Interactive streaming appears to be revenue-neutral for the recorded music industry.”
The nice thing about the study is that it manages to bolster both Spotify’s main argument to the music industry for the past few years — if you don’t let us distribute your music, and get some money for it, the pirates will do it and you’ll get none — and the music labels’ primary worry about streaming — there’s no way we’re going to sell enough subscriptions to replace albums and single-track sales!
The study is also timely, since the labels and Spotify are haggling over new distribution contracts — and YouTube, the world’s biggest digital music service, is about to do the same. Then again, there’s only so much haggling each side can do: The streaming services need the labels’ stuff to exist, but the labels need the streaming services, too — there’s no way they’re convincing people to buy downloads anymore.
Where is the money from spotify?
It seems that Spotify is renegotiations with the major label groups–that typically would include publishers but the Wall Street Journal reports that the “black box” at streaming services is even worse that we thought:
In the 10 months that ended this past January, Spotify users in the U.S. listened more than 708,000 times to “Out of Time” by the pop-punk band A Day to Remember, but the music-streaming service paid no songwriter royalties, according to data shared with the band’s record label and music publisher.
This omission doesn’t seem to be an isolated event. Of the millions of times Spotify users listened to songs distributed by Victory Records and published by sister company Another Victory Music Publishing during the same period, the service paid songwriter royalties only about 79% of the time, according to an analysis by Audiam Inc., a technology company that seeks to recover unpaid royalties.
So how to understand these numbers on a Spotify-wide basis? Let’s be kind–Spotify is probably paying on the hits at a far higher rate than indie songwriters. Let’s just assume that Spotify pays on a rough justice number of 60-70% of total streams. Meaning that they don’t pay on roughly 30-40% of total spins and that of this 30-40% independent publishers and self-administered songwriters are probably over represented.
According to Spotify’s head flack, Clintonista and frequent White House guest Jonathan Prince, it’s all the songwriters’ fault:
“We want to pay every penny, but we need to know who to pay,” Spotify spokesman Jonathan Prince explains. “The industry needs to come together and develop an approach to publishing rights based on transparency and accountability.” Spotify says it has paid over $3 billion to rights holders since it launched in 2008.
There are a couple different ways to back into a number that represents the Spotify black box. One way is to accept the $3 billion number (which is actually larger now and is increasing at an increasing rate–Billboard reported that Spotify hit that number in first quarter 2015 (so probably earned a bit earlier than that 3/31/15). If there’s only a 20% shortfall, that would mean that the Spotify black box has something like $60,000,000, rough justice.
But if it’s closer to the Medianet litigation numbers and you assume an underpayment of record royalties as well, that would get you to a much higher number. Independent artists frequently complain that they have no idea how their recordings are ending up on Spotify, so anecdotally that’s not so far fetched. If Spotify underpaid songwriters by the songwriter’s share of about $1.4-$2 billion, rough justice perhaps somewhere around $150 million. These numbers would also have to be further allocated based on US statutory royalties compared to ex-US.
So there’s two good ways to “pay every penny”–first way is to pay them pennies. (Of course, in Spotify’s case, we’re not really talking whole pennies, but how would it sound for Mr. Prince to say “We want to pay every mil”.)
Another good way is to clear the publishing before the song is used. In Spotify’s case, if the company qualifies for a compulsory mechanical license, there are very clear rules about what to do if you can’t find a songwriter or if there’s an undeliverable notice from a former address.
It is interesting to know where this “escrow” concept comes from. If the service wants to rely on the compulsory license they are supposed to send a notice under the Copyright Act and the regulations. If they can’t find a writer, they send the notice to the Copyright Office and the Copyright Office publishes a list of unknown songs for which they have received notices. (A thankless job, by the way, so we should all thank them for it.) In this way, the unknown writer has a hope of finding out that the service is trying to reach them.
This is similar to the unclaimed property office list that states typically maintain for closed bank accounts, utility deposit refunds and the like. It’s also similar to the settlement between the New York Attorney General and the major labels where the labels maintain a public list of artist royalties for artists they can’t locate.
So if they really want to pay every mil that Spotify owes, Spotify could very easily comply with its obligations under the compulsory license (which probably means they haven’t and probably means they’ve lost the ability to rely on the compulsory license and probably means they’re a…you know..a watchamacalit…an infringer). If they would prefer to ignore their obligations and just bully their way through with independent artists and publishers, they could use the song, get no license, send no notice, and then keep it a secret. Which is what they seem to be doing now (based on the fact that “Spotify” does not appear once on the Copyright Office list of unknown songwriters).
But let’s be clear–this isn’t just a few songs or partial songs that slipped through the cracks. This appears to be a standard business practice that affects an untold number of songs that may well measure in the tens of thousands if not more.
Here’s the other thing. An escrow agent explained that non-statutory escrow instructions have to be agreed upon by the parties, clearly expressed in writing to the escrow agent, the escrow agent has to accept the responsibility for the escrow and that there can never be a moment in the life of the escrow account when the escrow agent doesn’t know what to do based on the escrow instructions.
Of course…if you can’t find the party to pay…then…you can’t have a…you know, a contract…and yet Spotify (or the payors who follow this practice) is purporting to be an escrow agent. On terms unilaterally established by the service acting as an agent. There are a couple of escrow accounts established in the Copyright Act, just not for this purpose (the union share of webcasting royalties [17 USC Sec. 114(g)(2)(B)], the Sound Recordings Fund [17 USC Sec. 1006(b)] and certain rate court situations [17 USC Sec. 513(5)]).
So in Spotify’s case, it certainly seems that Spotify is unilaterally undertaking the responsibility for whatever funds they are accruing, even if they are doing it otherwise without basis in the law.
This situation is, of course, ready made for a class action, or it seems so to me. Maybe copyright infringement, breach of fiduciary duty, fraud, conversion and misappropriation.
Koala Power is almost 30K
We are very proud to almost hit the 30K plays with the latest beati-sounds track!
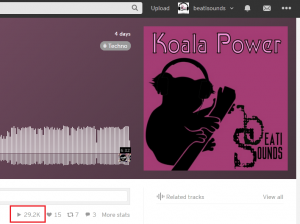
Help us to reach it and press play:
Beati Sounds – Koala Power by 🎶 🎶 Beati Sounds 🔑🔑🔑
Another great techno deephouse track by Beati Sounds!
Red Keyst hits more then 10.000 plays!
The latest beatisounds track “Red Keyst” has hit the 10.000 play mark on Soundcloud! Give your support!
Beati Sounds – Red Keyst (Aart Cut) by 🎶 🎶 Beati Sounds 🔑🔑🔑
A dark and deep techno track specially mixed for Aart.
8 Sound Design Tricks To Hack Your Listeners Ears
It’s easy to focus on the technology we use while mixing and mastering a track, but what happens to the sound after it leaves our speakers? How is that sound actually perceived by the brain? There are many mixing techniques we can use to trick the brain in to hearing what we want it to hear.
This basically falls under the heading of psychoacoustics, and with knowledge of a few psychoacoustic principles, there are ways that you can essentially ‘hack’ the hearing system of your listeners to bring them a more powerful, clear and ‘larger than life’ exciting experience of your music. Knowing how the hearing system interprets the sounds we make, we can creatively hijack that system by artifically recreating certain responses it has to particular audio phenomena.
Here you’ll also gain some extra insights into how and why certain types of audio processing and effects are so useful, particularly EQ, compression and reverb, in crafting the most satisfying musical experience for you and your listeners.
For example, if you incorporate the natural reflex of the ear to a very loud hit (which is to shut down slightly to protect itself) into the designed dynamics of the original sound itself, the brain will still perceive the sound as loud even if it’s actually played back relatively quietly. You’ve fooled the brain into thinking the ear has closed down slightly in response to ‘loudness’. Result: the experience of loudness, quite distinct from actual physical loudness. Magic…
1. The Haas Effect
Named after Helmut Haas who first described it in 1949, the principle behind the Haas Effect can be used to create an illusion of spacious stereo width starting with just a single mono source.
Haas was actually studying how our ears interpret the relationship between originating sounds and their ‘early reflections’ within a space, and came to the conclusion that as long as the early reflections (and also for our purposes, identical copies of the original sound) were heard less than 35ms after and at a level no greater than 10dB louder than the original, the two discreet sounds were interpreted as one sound. The directivity of the original sound would be essentially preserved, but because of the subtle phase difference the early reflections/delayed copy would add extra spatial presence to the perceived sound.
So in a musical context, if you want to thicken up and/or spread out distorted guitars for example, or any other mono sound source, it’s a good trick to duplicate the part, pan the original to extreme right or left and pan the copy to the opposite extreme. Then delay the copy by between about 10-35ms (every application will want a slightly different amount within this range), either by shifting the part back on the DAW timeline or by inserting a basic delay plugin on the copy channel with the appropriate delay time dialled in. This tricks the brain into perceiving fantastic width and space, while of course also leaving the centre completely clear for other instruments.
You can also use this technique when all you really want to achieve is panning a mono signal away from the busy centre to avoid masking from other instruments, but at the same time you don’t want to unbalance the mix by panning to one side or the other only. The answer: Haas it up and pan that mono signal both ways.
Of course there’s also nothing stopping you delaying slightly one side of a real stereo sound, for example if you wanted to spread your ethereal synth pad to epic proportions. Just be aware you will also be making it that much more ‘unfocused’ as well, but for pads and background guitars this is often entirely appropriate.
As you play with the delay time setting you’ll notice that if it’s too short you get a pretty nasty out-of-phase sound; too long and the illusion is broken, as you start to hear two distinct and separate sounds – not what you want here. Somewhere in between it’ll be just right and you’ll find just the space you want.
Also be aware that the shorter the delay time used, the more susceptible the sound will be to unwanted comb filtering when the channels are summed to mono – something to consider if you’re making music primarily for clubs, radio or other mono playback environments.
You’ll probably also want to tweak the levels of each side relative to each other, to maintain the right balance in the mix and the desired general left-right balance within the stereo spectrum.
Don’t forget you can apply additional effects to one or both sides: for example try applying any subtle LFO-controlled modulation or filter effects to the delayed side for added interest.
A final word of caution: don’t overdo it! Use the Haas Effect on one or two instruments maximum in a full mix, to avoid completely unfocusing the stereo spread and being left with phasey mush.
2. Frequency Masking
There are limits to how well our ears can differentiate between sounds occupying similar frequencies. Masking occurs when two or more sounds occupy the exact same frequencies: in the ensuing fight, generally the louder of the two will either partially or completely obscure the other, which seems to literally ‘disappear’ from the mix.
Obviously this is a pretty undesirable ‘phenomenon’, and it’s one of the main things to be aware of throughout the whole writing, recording and mixing process. It’s one of the main reasons EQ was developed, which can be used to carve away masking frequencies at the mix, but it’s preferable to avoid major masking problems to begin with at the writing and arranging stages, using notes and instruments that each occupy their own frequency range.
Even if you’ve taken care like this, sometimes masking will still rear it’s ugly head at the mix, and it’s difficult to determine why certain elements still sound different soloed than they do in the full mix context. The issue here is likely to be that although the root notes/dominant frequencies of the sound have the space they need, the harmonics of the sound (that also contribute to the overall timbre) appear at different frequencies, and it’s these that may still be masked.
Again, this is probably the point where EQ comes into play.
3. The Ear’s Acoustic Reflex
As mentioned in the introduction, when confronted with high-intensity stimulus – or as Brick Tamland from Anchorman would put it, ‘Loud noises!’ – the middle ear muscles involuntarily contract, which decreases the amount of vibrational energy being transferred to the sensitive cochlea (the bit that converts the sonic vibrations into electrical impulses for processing by the brain). Basically, the muscles clam up to protect the more sensitive bits.
The brain is used to interpreting the dynamic signature of such reduced-loudness sounds, with the initial loud transient followed by immediate reduction as the ear muscles contract in response, so it still senses ‘very loud sustained noise’.
This principle is often used in cinematic sound design and is particularly useful for simulating the physiological impact of massive explosions and high-intensity gunfire, without inducing a theatre full of actual hearing-damage lawsuits.
The ears reflex to a loud sound can be simulated by playing manually with the fine dynamics of the sounds envelope. For example, you can make that explosion appear super-loud by actually shutting down the sound artificially following the initial transient: the brain will interpret this as the ear responding naturally to an extremely loud sound – perceiving it as louder and more intense than the sound actually, physically is. This also works well for booms, impacts and other ‘epic’ effects to punctuate the drops in a club or electronic track.
The phenomenon is also closely related to why compression in general often sounds so exciting and can be used in it’s own way to simulate ‘loudness’… more on that below.
4. Create the impression of power and loudness even at low listening levels
If you take only one thing away from this article, it should be this: the ears natural frequency response is non-linear. More specifically, our ears are more sensitive to mid-range sounds than to frequencies at the extreme high and low ends of the spectrum. We generally don’t notice this as we’ve always heard sound this way and our brains take the mid-range bias into account, but it does become more apparent when we’re mixing, where you’ll find that the relative levels of instruments at different frequencies will change depending on the overall volume you’re listening at.
Before you give up entirely on your producing aspirations with the realisation that even your own ears are an obstacle to achieving the perfect mix, take heart that there are simple workarounds to this phenomenon. And not only that, but you can also manipulate the ears non-linear response to different frequencies and volumes to create an enhanced impression of loudness and punch in a mix, even when the actual listening level is low.
The non-linear hearing phenomenon was first written about by researchers Harvey Fletcher and Wilden A. Munson in 1933, and although the data and graphs they produced have since been slightly refined, they were close enough with their findings that ‘Fletcher-Munson’ is still a shorthand phrase for everything related to the subject of ‘equal loudness contours’.
Generally, taking all this into account you should be able to do the best balancing at low volumes (this also saves your ears from unnecessary fatigue, so I’d recommend it anyway). Loud volumes are generally not good for creating an accurate balance because, as per Fletcher-Munson, everything seems closer.
In certain situations, for example when mixing sound for films, it’s better to mix at the same level and in a similar environment to where the film will eventually be heard in theaters: this is why film dubbing theaters look like actual cinemas, and are designed to essentially sound the same too. It’s the movie industry’s big-budget equivalent of playing a pop mix destined for radio play on your car stereo: the best mixes result from taking into account the end listener and their environment, not necessarily mixing something that only sounds great in a $1 million studio.
So, how does our ears sensitivity to the mid-range actually manifest on a practical level? Try playing back any piece of music at a low level. Now gradually turn it up: as the level increases, you might notice that the ‘mid-boost’ bias of your hearing system has less of an effect, with the result that the high- and low-frequency sounds now seem proportionally louder (and closer, which we’ll go into in the next tip).
Now the exciting part: Given that extreme high and low frequencies stand out more when we listen to loud music, we can create the impression of loudness at lower listening levels by attenuating the mid-range and/or boosting the high and low ends of the spectrum. On a graphic EQ it would look like a smiley face, and it’s why producers will talk about ‘scooping the mid-range’ to add weight and power to a mix.
This trick can be applied in any number of ways, from treating the whole mix to some (careful) broad EQ at mixdown or mastering, to applying a ‘scoop’ to just one or two broadband instruments or mix stems i.e. just the drums or guitars submix. As you gain experience and get your head around this principle (if you have a good ear for such things you might already be doing it naturally), you can begin to build your track arrangements and choices of instrumentation with an overall frequency dynamic in mind right from the beginning. This is especially effective for styles like Drum & Bass, where you can achieve amazingly impactful and rich-sounding mixes with just a few elements that really work those high and (especially) low ends for all they’re worth; the mid-range leveling can then act primarily as an indicator of a ‘nominal’ base level, made artificially low like a false floor, simply to enhance the emphasis on the massive bass and cutting high-end percussion and distortion. The same works well for rock too: just listen to Nirvana’s Nevermind for a classic, thundering example of scooped mids dynamics.
Just remember to be subtle: it’s easy to overdo any kind of broad frequency adjustments across a whole mix, so if in doubt, leave it for mastering.
5. Equal Loudness Part II: Fletcher-Munson Strikes Back
Of course the inverse of the closer/louder affect of the ears non-linear response is also true, and equally useful for mix purposes: to make things appear further away, instead of boosting you roll off the extreme highs and lows. This will create a sense of front-to-back depth in a mix, pushing certain supporting instruments into the imaginary distance and keeping the foreground clear for the lead elements.
This and the previous trick work because a key way that our ears interpret how far away we are from a sound source is by the amount of high- and low-frequency energy present relative to the broader mid-range content. This is all because the ears have adapted to take into account the basic physics of our gaseous Earth atmosphere: beyond very short distances the further any sound travels, the more high-frequency energy (and to a slightly lesser extent, extreme low-end as well) will simply be dissipated into the air, the atmosphere it’s traveling through.
Therefore, to push a sound further back in the mix, try rolling off varying amounts of its higher frequencies and hear it recede behind the other elements. This is often particularly useful for highlighting a lead vocal in front of a host of backing vocals (cut the BVs above around 10kHz, possibly boost the lead vocal in the same range slightly). I also find it useful when EQing drum submixes to ensure the drums are overall punchy but not too in-your-face frontal (a touch of reverb is also an option here of course).
6. Transients appear quieter than sustained sounds of the same level
This is the key auditory principle behind how compression makes things sound louder and more exciting without actually increasing the peak level. Compressors are not as intuitively responsive as the human ear, but they are designed to respond in a similar way in the sense that short duration sounds aren’t perceived as being as loud as longer sounds of exactly the same level (this is called an RMS or ‘Root Mean Square’ response, a mathematical means of determining average signal levels).
So compressing the tails of sounds such as drums, that are relatively quiet compared to the high-energy initial transient attack, fools the brain into thinking the drum hit as a whole is significantly louder and punchier, although the peak level – the transient – has not changed. This is how compressors allow you to squeeze every ounce of available headroom out of your sounds and mix: as ever though, just be careful not to ‘flatline’ your mix with over-compression.
7. Reverb Early Reflection ‘Ambience’ For Thickening Sounds
If you combine part of the principle behind the Haas Effect with the previous tip about sustained sounds being perceived as louder than short transients at the same level, you’ll already understand how adding the early reflections from a reverb plugin can be used to attractively thicken sounds. It can take a moment to get your head around if you’re very used to the idea that reverb generally diffuses and pushes things into the background. Here, we’re using it without the characteristic reverb ‘tail’, to essentially multiply up and spread over a very short amount of time the initial transient attack portion of the sound. By extending this louder part of the sound we’ll get a slightly ‘thicker’ sound, but in a very natural ‘ambient’ way that is easily sculpted and tonally finetuned with the various reverb controls. And with the distancing and diffusion effects of the long tail you can retain the ‘upfront’ character of the sound.
8. Decouple a sound from it’s source
A sound as it is produced, and the same sound as it is perceived in it’s final context are really not the same thing at all. This is a principle that is exploited quite literally in movie sound effects design, where the best sound designers develop the ability to completely dissociate the sonic qualities and possibilities of a sound from its original source. This is how Ben Burtt came up with the iconic sound of the lightsabers in Star Wars:
“I had a broken wire on one of my microphones, which had been set down next to a television set and the mic picked up a buzz, a sputter, from the picture tube – just the kind of thing a sound engineer would normally label a mistake. But sometimes bad sound can be your friend. I recorded that buzz from the picture tube and combined it with the hum [from an old movie projector], and the blend became the basis for all the lightsabers.”
– Ben Burtt, in the excellent The Sounds Of Star Wars interactive book
Does that make Burtt one of the original Glitch producers..?
One last example: the Roland TR-808 and TB-303 were originally designed to simulate real drums and a real bass for solo musicians. They were pretty shocking at sounding like real instruments, but by misusing and highlighting what made them different from the real thing – turning the bass into screaming acid resonance and tweaking the 808 kick drum to accentuate its now signature ‘boom’ – originating Techno producers like Juan Atkins and Kevin Saunderson perceived the potential in their sounds for something altogether more exciting than backing up a solo guitarist at a pub gig.
Also consider Johnny Cash’s track I Walk The Line, which featured his technique of slipping a piece of paper between the strings of his guitar to create his own ‘snare drum’ effect. Apparently he did this because snares weren’t used in Country music at the time but he loved their sound and wanted to incorporate it somehow. The sound, coupled with the ‘train-track’ rhythm and the imagery of trains and travel in the lyrics, brings a whole other dimension to the song. And all with just a small piece of paper.
So remember that whether you’re creating a film sound effect or mixing a rock band, you don’t have to settle for the raw or typical instrument sounds you started with. Similarly, if you find that upside-down kitchen pans give you sounds that fit your track better than an expensive tuned drum kit, use the pans! If you find pitched elephant screams are the perfect addition to your cut-up Dubstep bassline (it works for Skrillex), by all means… The only thing that matters is the perceived end result – no-ones ears care how you got there! (What’s more, they’ll be subliminally much more excited and engaged by sounds coming from an unusual source, even if said sounds are taking the place of a conventional instrument in the arrangement.)
EDMJoy features Star Beach and Sun
We are proud to be featured on EDMJoy.com. From the pool of rising talent comes another new up and coming artist, a DJ and Producer from the Netherlands, Beati Sounds. His new release, “Star Beach And Sun,” features a bounce/big room vibe, with various different sounds accenting the song. With a powerful buildup, with a mix of sharp synths and keys, followed up by a strong, bassy and in-your-face drop that fuses the elements of both big room and bounce.
Find the feature here: http://edmjoy.com/2015/08/beati-sounds-releases-star-beach-and-sun/
Star Beach And Sun [FREE DOWNLOAD]
Beati Sounds latest EDM track has been featured on housebootlegs.com. Their comment: Just when you think that you are listening to a sweet clubby track that the drops in this new release by Beati Sounds grabs you!! Surprising great progressive track.
We give this song away for free to support this! Get your copy here:
http://hypeddit.com/index.php?fan_gate=1KqNOVQWpx7NjOq0qVcm
« Previous 1 2 3 4 Next »







![Star Beach And Sun [FREE DOWNLOAD]](https://beati-sounds.com/wp-content/uploads/2015/03/Festival.png)
